Creating a Canva-like design tool: Tech choices and lessons learned
Posted on: 12/30/2024 9:53:12 AM
Today, I’ll walk you through the process of choosing the tech stack for building this design tool. The goal is to create a tool that can function as a standalone application or integrate seamlessly with a CMS, or your products.
Choosing tech stack
The choice of technology depends heavily on the tool’s purpose and flexibility. Here are some of the options I considered:
Pure JavaScript/TypeScript
- Pros:
- Highly flexible and can be integrated with any project.
- No dependencies, making it lightweight.
- Cons:
- Development time may be longer due to the need to build core features from scratch.
jQuery & jQuery UI
- Pros:
- Comes with built-in support for core interactions like drag-and-drop, resizing, and rotating elements.
- Simple DOM manipulation capabilities.
- Cons:
- Outdated and less popular in modern web development.
- Limited support for advanced frameworks and modern practices.
Vue.js
- Pros:
- Fast development with its reactive data binding and modular structure.
- Excellent community support and ready-to-use libraries.
- Cons:
- Integration with projects using other tech stacks may require additional layers, such as iframes and the
postMessageAPI.
- Integration with projects using other tech stacks may require additional layers, such as iframes and the
After experimenting with these options, I decided to go with Vue.js. Its simplicity, speed, and flexibility make it a great choice for rapidly developing the tool. While integrating it into other projects with different stacks might involve a bit more effort, the benefits during development outweigh the drawbacks.
Exploring Libraries
Now that the tech stack is set, the next step is to implement the foundational features that any design tool needs:
Drag & Drop
Allow users to freely move elements around the canvas. This is the backbone of any design tool.
Resize
Enable resizing of elements while maintaining aspect ratios or freeform resizing.
Rotate
Give users the ability to rotate elements for more dynamic designs.
Group
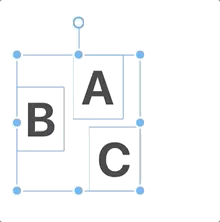
Allow user select multiple elements at once to bulk edit
Now is time to exploring some libraries to do above tasks. We have 2 options:
- Canvas-based library
- These libraries take a different approach by using canvas to render and manipulate elements. They’re powerful for complex graphics editing but come with some trade-offs.
- Html-based (div, span,..etc) library
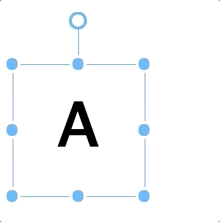
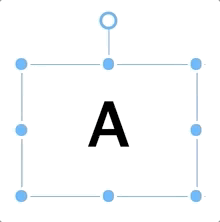
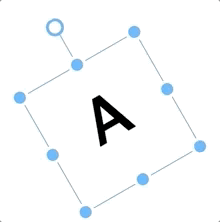
- These libraries are excellent for building drag-and-drop interfaces. You can experiment with Moveable online here. It even provides a live demo showcasing its features. The GIFs I’ve shared above are examples of what it can do!
- These libraries are excellent for building drag-and-drop interfaces. You can experiment with Moveable online here. It even provides a live demo showcasing its features. The GIFs I’ve shared above are examples of what it can do!
My decision
Initially, I chose Fabric.js for its rich features, extensive support for multiple element types, and well-documented examples. It seemed like a solid choice for building a robust design tool.
However, as I sit here writing this post, I’ve started to reconsider. I spent 2 months to handle 90% of the workload as written in the previous article, but if I had to choose again, I would start with the html-based direction. For many use cases, a HTML-based library might be a better fit than a canvas-based one. Here’s why:
-
Easier Debugging
- With an HTML-based library, you can easily inspect elements using browser dev tools.
- You’ll have access to the full DOM tree, CSS styles, and other familiar tools for debugging.
-
Native Video Support
- Canvas doesn’t natively support video elements, which can be a challenge if your tool involves multimedia.
- Using tricks to render videos in a canvas environment adds unnecessary complexity.
-
Better Accessibility
- HTML-based designs inherently support accessibility standards like ARIA attributes, which are harder to implement in canvas-based tools.
-
Simpler Integrations
- HTML elements are easier to integrate with frameworks and libraries for animations, styling, or interactions.
So, what’s the lesson here?
Did I choose the wrong tech stack for my team?
Not necessarily. Every decision comes with trade-offs, and while a canvas-based approach like Fabric.js presents some challenges - such as handling video rendering or animation processing - it’s not without its strengths. With the current direction, I can still manage these complexities using workarounds and additional tools.
Choosing a tech stack is rarely about finding the “perfect” solution. It’s about understanding the priorities of your project and the trade-offs you’re willing to accept. In this case, Fabric.js offers a lot of flexibility for handling multiple element types and creating a polished design experience, even if it requires some extra effort in certain areas.
The key takeaway? Always be open to reassessing your decisions as you progress. Tools and technologies evolve, and so does your understanding of your project’s needs. What seems like the best option at the start may not remain so as you dig deeper into development.
Let's do it.
Now, i'll show you the source code, you can start from it.
1. Init project using vite
pnpm create vite app-name --template vue
2. Intall dependencies
pnpm install fabric
3. Import fabricjs and main working canvas
import { Canvas, Rect, Circle, Text, FabricImage, Group, util } from 'fabric';
A toolbar with some init elements
<div class="toolbar">
   <button @click="addRectangle">Add Rectangle</button>
</div>
Init canvas on mounted
mounted() {
    // Initialize Fabric.js canvas
    this.canvas = new Canvas(this.$refs.canvasElement, {
      width: 800,
      height: 600,
      backgroundColor: "#f3f3f3",
    });
},
addRectangle method
addRectangle() {
      // Create a rectangle and add it to the canvas
      const rect = new Rect({
        left: 100,
        top: 100,
        fill: 'blue',
        width: 150,
        height: 100,
        selectable: true,
      });
      this.canvas.add(rect);
},
This is just some basic functions, now our elements can drag, resize, rotate. Next, I’ll share how to add video element with fabricjs. You can view original fabricjs demo video element support here.
addVideo method
addVideo() {
      // Create a video HTML element
      const videoElement = document.createElement('video');
      videoElement.src = "/path/to/video.mp4"; // Replace with your video URL
      videoElement.autoplay = true;
      videoElement.loop = true;
      videoElement.muted = true;

      // Create a Fabric.js image from the video element
      const fabricVideo = new FabricImage(videoElement, {
        left: 150,
        top: 150,
        scaleX: 0.5,
        scaleY: 0.5,
        selectable: true,
      });

      // Add video to the canvas and render
      this.canvas.add(fabricVideo);
      this.canvas.renderAll();
    }
Now, we can export/ import our canvas
//export
canvas.toJSON()

//import
canvas.loadFromJSON(jsonData, () => {
    canvas.renderAll();
});

//export to image
canvas.toDataURL({
    format: "png",
    left: 0,
    top: 0,
    width: 800 ,
    height: 600 ,
});
That’s it for now! In the next post, we’ll take things up a notch by exploring element animation with support for keyframes and timelines.
Disclaimer: The opinions expressed in this blog are solely my own and do not reflect the views or opinions of my employer or any affiliated organizations. The content provided is for informational and educational purposes only and should not be taken as professional advice. While I strive to provide accurate and up-to-date information, I make no warranties or guarantees about the completeness, reliability, or accuracy of the content. Readers are encouraged to verify the information and seek independent advice as needed. I disclaim any liability for decisions or actions taken based on the content of this blog.